Now that Elon Musk owns Twitter, I am exploring alternatives. A while ago I came across Twitodon, which allows you to find the people you are following on Twitter (friends) on Mastodon.
Now, personally, I prefer to use Counter.social. Unfortunately, I did not find a site that allowed me to find my friends from Twitter on Counter.social (CoSo for short).
Anyway, enter Twitoso: a simple Python script that uses the Twitter API to get the username of your friends and saves them to a file. You can then import that file into CoSo to automatically follow the same friends, as long as they used the same username.
This is very basic and could be more intelligent, but it saved me a ton of time - hope it helps you as well.
~I will be on Twitter for the foreseeable future, but you can now also find me on Counter.social as @jaypowerbi.~
Update: I am no longer on Twitter but on BlueSky: https://bsky.app/profile/jaypowerbi.bsky.social
Here we are again - trying to continue the tradition of updating my Power BI analysis of the Dutch Radio 2's Top 2000. Later than ever this year, I was on vacation since early December.
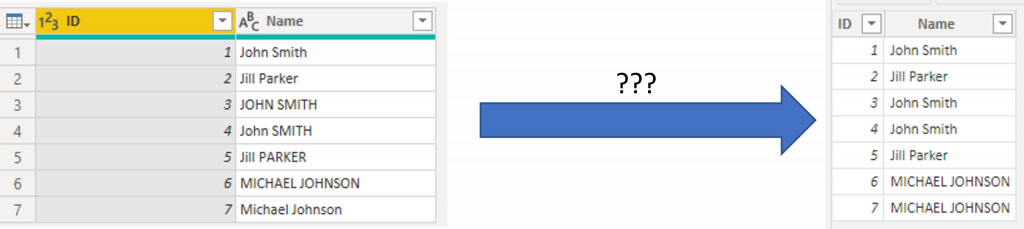
Some of you might have seen this before - you load some data into Power BI and suddenly the capitalization (uppercase / lowercase) of your text changes on you. Let me explain what is happening here.
On the left, Data Transformation window where the data is as I expected. On the right: Power BI after loading the data. Capitalization is not the same. Why does this happen?
Why this happens
The reason for this is simple: The Analysis Services engine that underpins Power BI is case-insensitive (no, there is no way for you to change that). Also, the engine uses compression techniques to handle the massive amounts of data it can handle. Those two things combined result in this behavior. Here's the details on what the engine does:
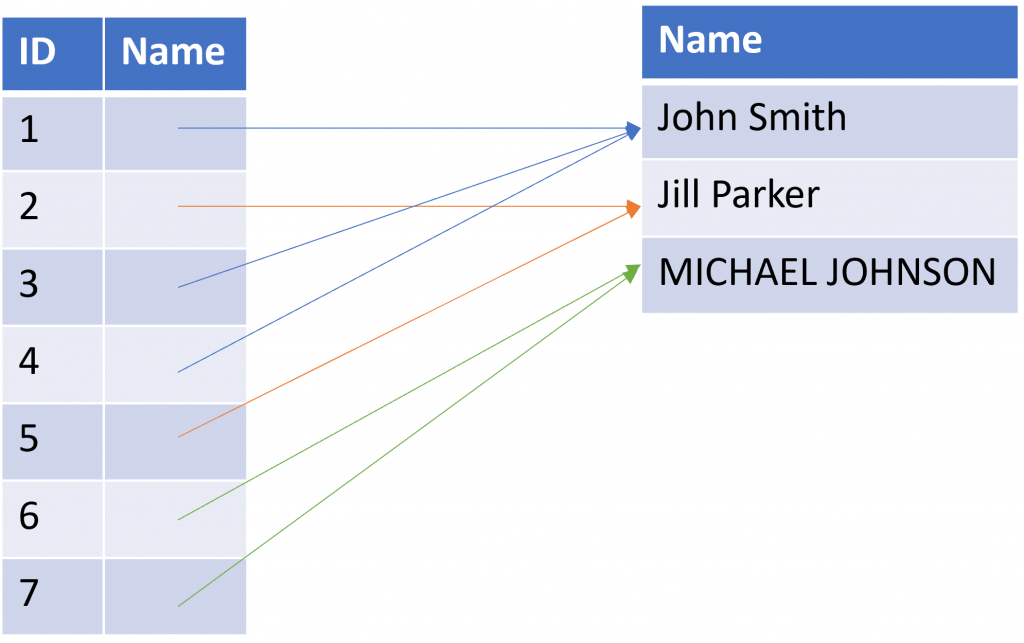
When loading the data, the engine starts evaluating the data top to bottom. The first Name it sees is for row 1, ID 1: 'John Smith'. It stores that value in a list for tracking the unique values of Name. Then it stores the ID and the reference to 'John Smith' in the list of Names and continues to row 2.
For row 2, It sees another Name: 'Jill Parker'. It compares it to what it already has stored in the list of Names ('John Smith'), ignoring case/capitalization and sees that it's not the same. It happily stores the value in the separate list, stores the ID and the reference and continues to row 3.
For row 3, it compares 'JOHN SMITH' to what it already has stored ('John Smith' and 'Jill Parker') and concludes that 'JOHN SMITH' is the same as 'John Smith' (remember, it is case insensitive, so then these are indeed the same). As they are the same, it does not store 'JOHN SMITH' separately, but instead stores '3' as ID and then refers the Name to the 'John Smith' it already stored before. For row 4, exactly the same: 'John SMITH' is the same as 'John Smith' ignoring capitalization. For row 5, 'Jill PARKER' is the same as 'Jill Parker' ignoring capitalization, so again the same.
Row 6 provides a different name 'MICHAEL JOHNSON' so the engine stores it.
Row 7 again has the same name, so that is not stored, just referred.
At the end of processing the engine has the following captured. I am simplifying things here, as this is not exactly how it happens, but the idea is similar:
So as a result, the rows shown after data is loaded are exactly as in the screenshot above. The reason capitalization is not consistent is simply because the engine came across those ways of printing the Names first.
Ahhh, Power BI and Home Assistant. Two of my favorite tools. So, why not try to bring them together? I like the Home Assistant data visualizations, but they are limited - that's where Power BI can really help. But how to bring data from Home Assistant to Power BI? Well, I figured it out, so here's is how.
I chose to use DirectQuery mode in Power BI to avoid having to import a sizable dataset in to Power BI and suffer from delays. I want Power BI to show real-time information from Home Assistant, so DirectQuery is the way forward.
The problem is that the way Home Assistant stores that is not entirely great for Power BI. So, you would have to introduce a layer between Home Assistant and Power BI to present that in a slightly different structure to Power BI compared to how Home Assistant stores it. Alternatively, you could use Power Query to try to transform the data there, but that would not work. A SQL view is the solution here. That leads to the first ingredient: the database. Once you have the database set up you can add views and have Power BI connect to the views.
Step 1: use MariaDB as your Home Assistant Database
By default, Home Assistant leverages a SQLite database. I was unable to connect this to Power BI reliably. Also, I was unable to add a view to the database that provides the data in the structure that Power BI handle. Hence, my advice is: switch to another database. I picked MariaDB. So, first off: run MariaDB as your Home Assistant database. Install the MariaDB add-on following these instructions.
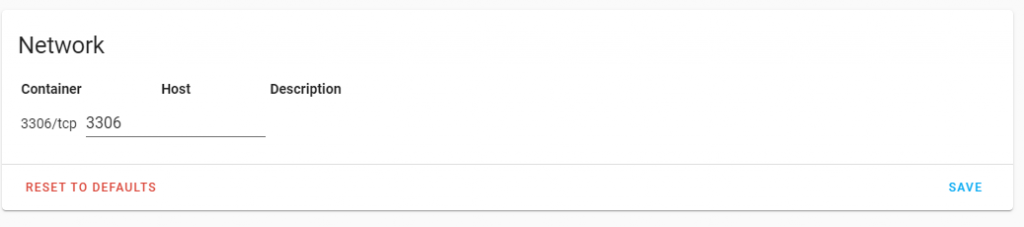
On the configuration page of the MariaDB addon enable port 3306 as the host port and hit save. Then restart the addon.
Restart your Home Assistant environment and make sure you don't get any recorder errors.
Run the below query on your homeassistant database using PhpMyAdmin. You can also download the query here.
DROP FUNCTION IF EXISTS `IsNumeric`;
DROP VIEW IF EXISTS `states_powerbi`;
DROP VIEW IF EXISTS `entities_powerbi`;

CREATE FUNCTION IsNumeric (sIn varchar(1024)) RETURNS tinyint
RETURN sIn REGEXP '^(-|\\+){0,1}([0-9]+\\.[0-9]*|[0-9]*\\.[0-9]+|[0-9]+)$';

CREATE VIEW states_powerbi as
select
	a.state_id
    ,a.entity_id
    ,a.state
    ,a.attributes
    ,JSON_EXTRACT(a.attributes, '$.unit_of_measurement') as unit_of_measurement
    ,a.last_changed
    ,a.last_updated
    ,a.created
    ,CASE WHEN a.isnumeric = 1 THEN a.state_numeric else NULL END as state_numeric
from (
    select
        state_id,
        entity_id,
        state,
        attributes,
        last_changed,
        last_updated,
        created,
        IsNumeric(state) as isnumeric,
        CAST(state as float) as state_numeric
    from states
) a;

CREATE VIEW entities_powerbi as
SELECT distinct entity_id, domain FROM states;
Step 4: connect Power BI to your Home Assistant installation
First of all, you will need to make sure you have the MariaDB ODBC driver installed for Power BI to be able to load data from the MariaDB database. Be sure to select the ODBC driver and the appropriate version (64 or 32 bits). Here are direct links, although the version of the driver could be outdated: 64-bit or 32-bit. After installing the driver, open this Power BI file in Power BI Desktop.
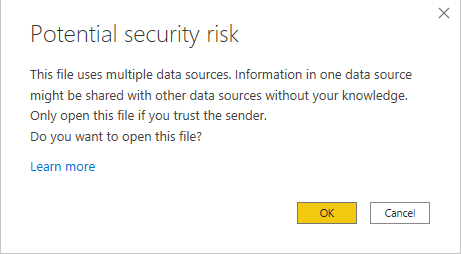
Select 'OK' in the security risk pop-up:
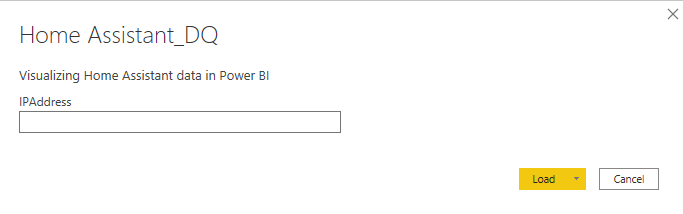
You should get a request to enter the local IP of your Home Assistant installation. If not, open the Power Query Editor by choosing Transform Data and change the IPAddress parameter value there.
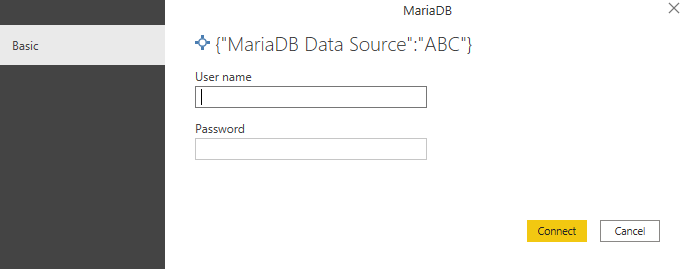
After entering the IP Address you should be prompted for credentials to connect to the MariaDB. The default username is homeassistant and the password is whatever you set up in step 1.
After this, select Close & Apply to apply these changes.
Step 5: Enjoy
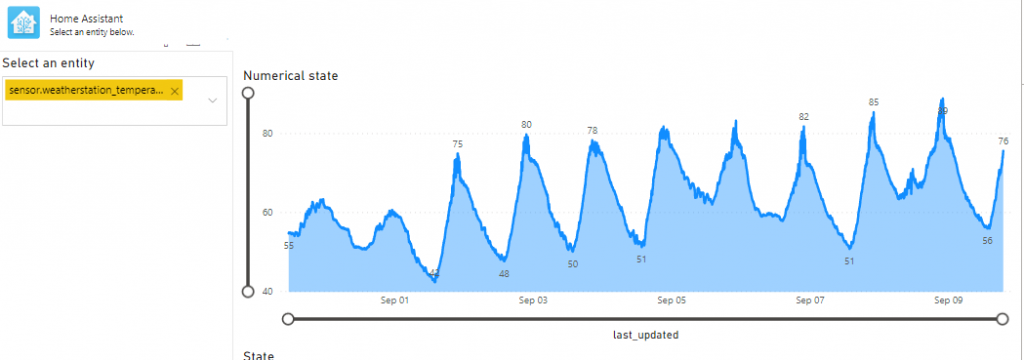
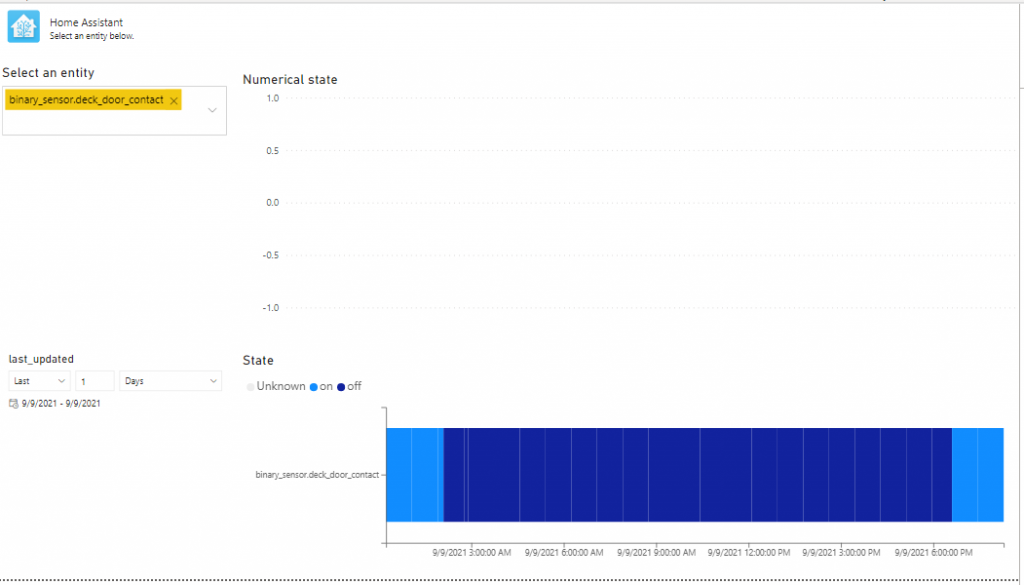
The report provided is just an example report and allows you to search entities and show their values. The top right is an area chart which is great for numerical values such as temperatures. The bottom right is a custom visual built by Jan Pieter Posthuma which is great for entities that are not numerical (such as open/closed or home/away) which you can find here. For more info on this visual please read the documentation available here or look at the issues reported on GitHub.
Numerical sensorNon numerical sensor
I hope you enjoy exploring your Home Assistant data using Power BI! Let me know what you think and please share what you produce! I am sure there is way more to do and cool things to build, so curious to hear from you!
I have two garage doors, both of which can have motors and can be opened automatically from my car, using a remote or a press off a button. Very convienient.
However, sometimes I want to check if the garage doors are closed and be able to close / open them remotely, even if I am not anywhere near them.
Now, you can buy new garage door motors or buy something that makes them smart, but what's the fun in that? It is just another app on your mobile phone, another company storing your data in the cloud and another security hole in your network.
I decided to make my own controllers for my garage doors. In fact, my idea was very simple: since most automatic garage doors have a physical, wired, button a relay should be able to mimic that button press. Also, I wanted to make it a bit more fancy and know if the door was closed, open or if a vehicle was parked in the parking spot. For that I needed a ultrasonic distance sensor.
I looked at various solutions, including opengarage.io, which is very similar, but too expensive for my taste, because I had to buy two (one for each door). Also I did not like their interface.
In the end, this is my solution:
A Wemos D1 mini that runs a custom Arduino solution, which sends status and accepts commands over MQTT from a solution like Home Assistant. It also is configured for updates over the air.
Two relays, one for each garage door
Two HCSR04 ultrasonic distance sensors, one for each garage door.
The code can be easily extended to handle more than two doors.
I wanted to make the solution relatively secure, so I came up with a 'rolling cypher' security scheme. The controller only accepts the command to open the door when the cypher provided with the command matches with its calculation. For security purposes I removed that part from the code before sharing.
You can find the code and how to make it work for your situation on my GitHub.
 Dutch Data Dude